
Gear: Kamvas Pro 19
Software: Photoshop
Your likes and comments help us improve our content – thank you for taking the time to engage with us! 😀
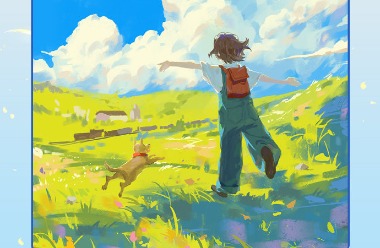
This is a short but clear tutorial for creating a vibrant summer scene with a blue sky and white clouds. Grab your pen and follow the guide to try it out!
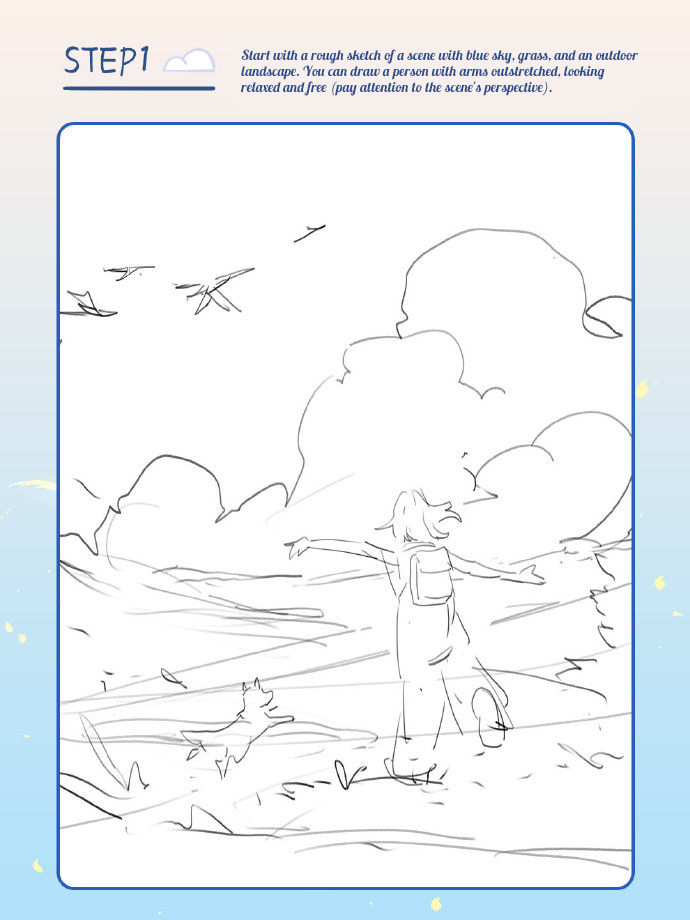
Step 1:
Start with a rough sketch of a scene with a blue sky, grass, and an outdoor landscape. You can draw a person with arms outstretched, looking relaxed and free (pay attention to the scene’s perspective).
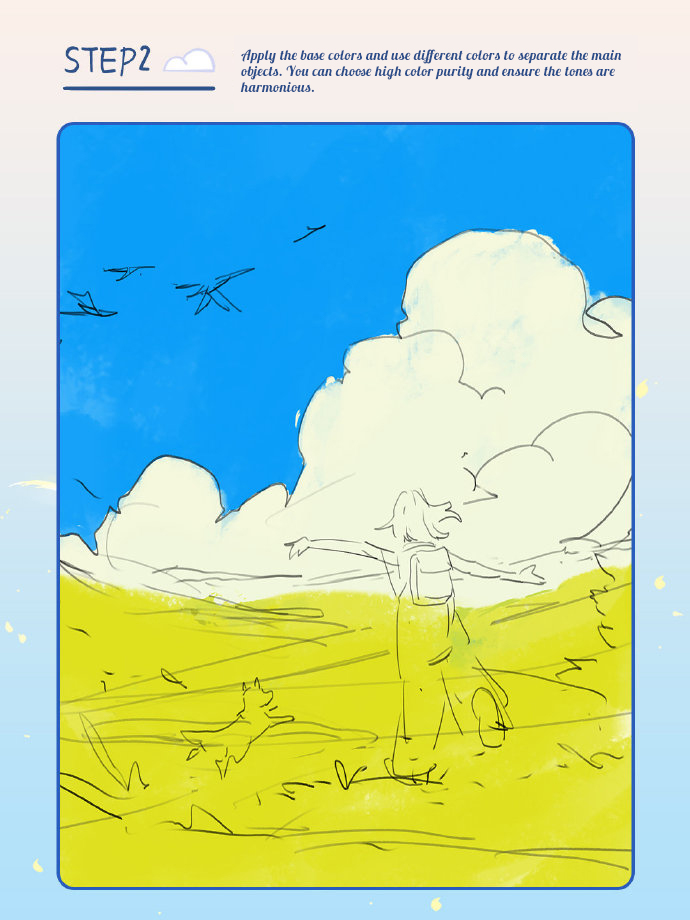
Step 2:
Apply the base colors and use different colors to separate the main objects. You can choose high color purity and ensure the tones are harmonious.
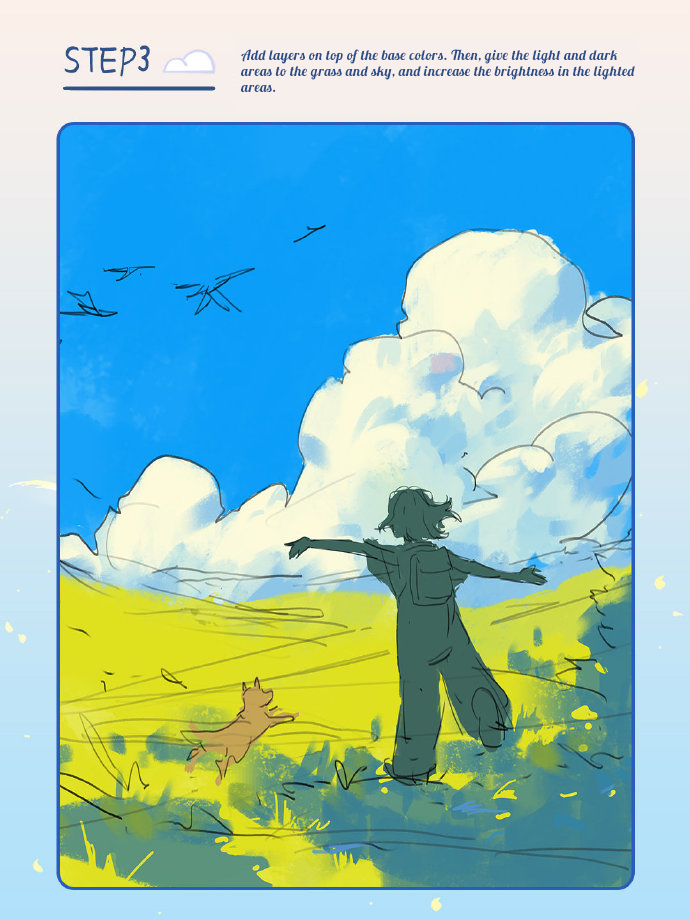
Step 3:
Add layers on top of the base colors. Then, give the light and dark areas to the grass and sky, and increase the brightness in the lighted areas.
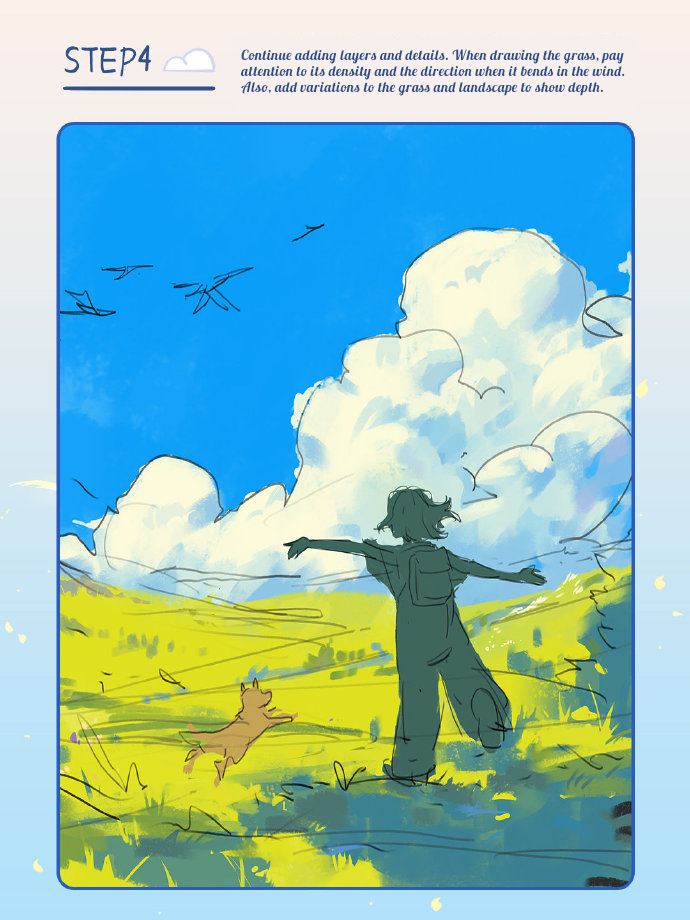
Step 4:
Continue adding layers and details. When drawing the grass, pay attention to its density and the direction when it bends in the wind. Also, add variations to the grass and landscape to show depth.
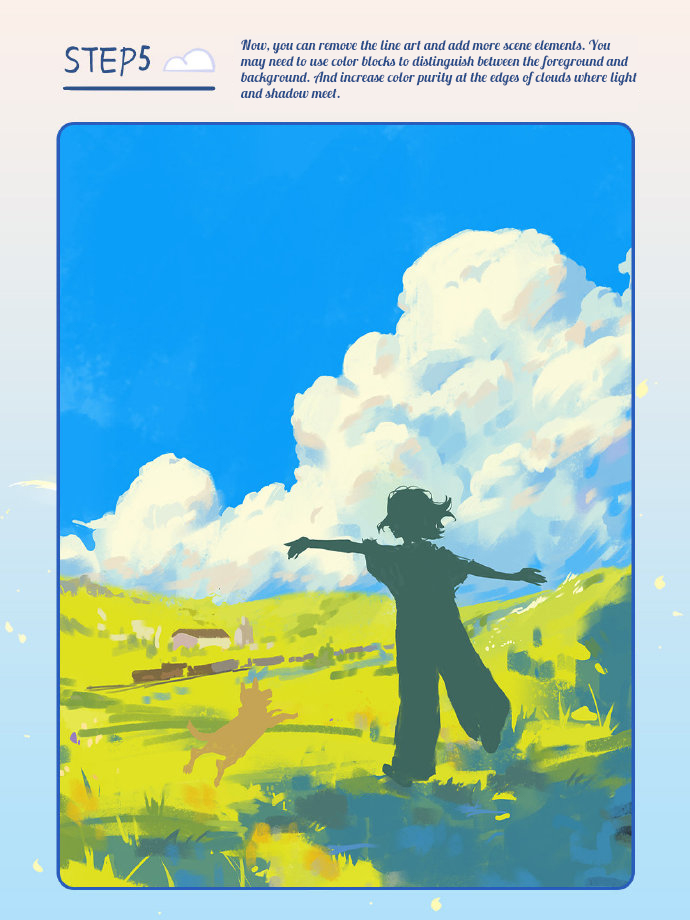
Step 5:
Now, you can remove the line art and add more scene elements. You may need to use color blocks to distinguish between the foreground and background. And increase color purity at the edges of clouds where light and shadow meet.
Step 6:
Enhance the grass details further by adding flowers and plants in the foreground to create a sense of depth. This step focuses on the visual center of this painting.

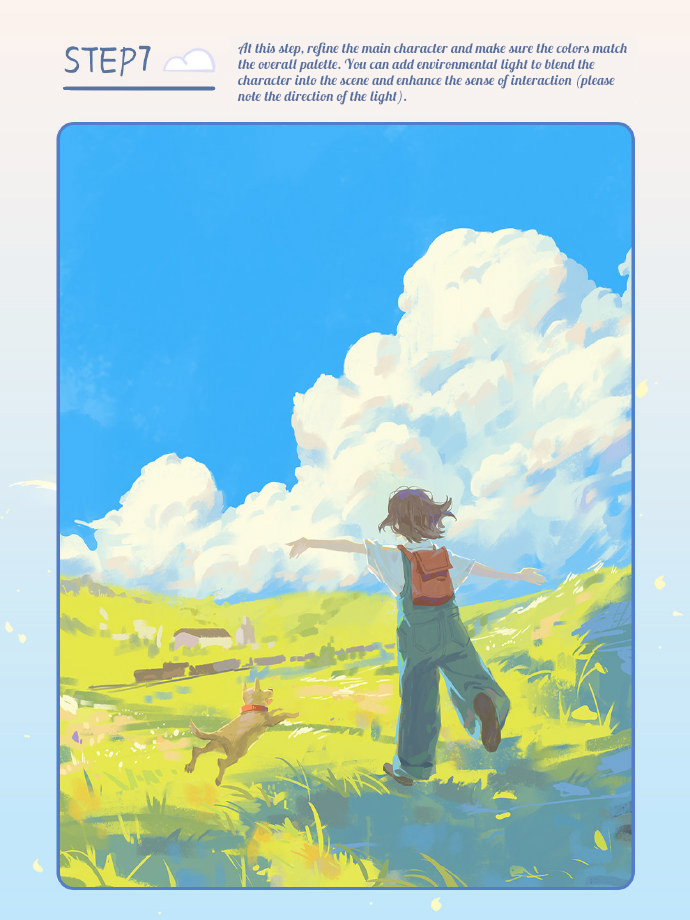
Step 7:
At this step, refine the main character and make sure the colors match the overall palette. You can add environmental light to blend the character into the scene and enhance the sense of interaction (please note the direction of the light).
Step 8:
Finally, adjust the overall effect of this painting and add more scene elements. Carefully blend the colors for a vibrant summer scene with a blue sky and white clouds.